Managing instrumentation
In the next step, you set up instrumentation for compositions. Instrumentation defines what instrument parts are needed for each musical work. Instrumentation setup is typically done once per composition and creates the foundation for individual part management.
Table of contents
Describing the instrumentation entry
The composition instrumentation page is designed to help you create parts definitions quickly by selecting the instruments’ part types from a list, matching the instrumentation that publishers provide on the conductor’s score. From this page you can set the paper size and page count for all of the parts, on one entry. To create parts from the instrumentation page, you can check the score for complete instrumentation, or look through physical individual parts.
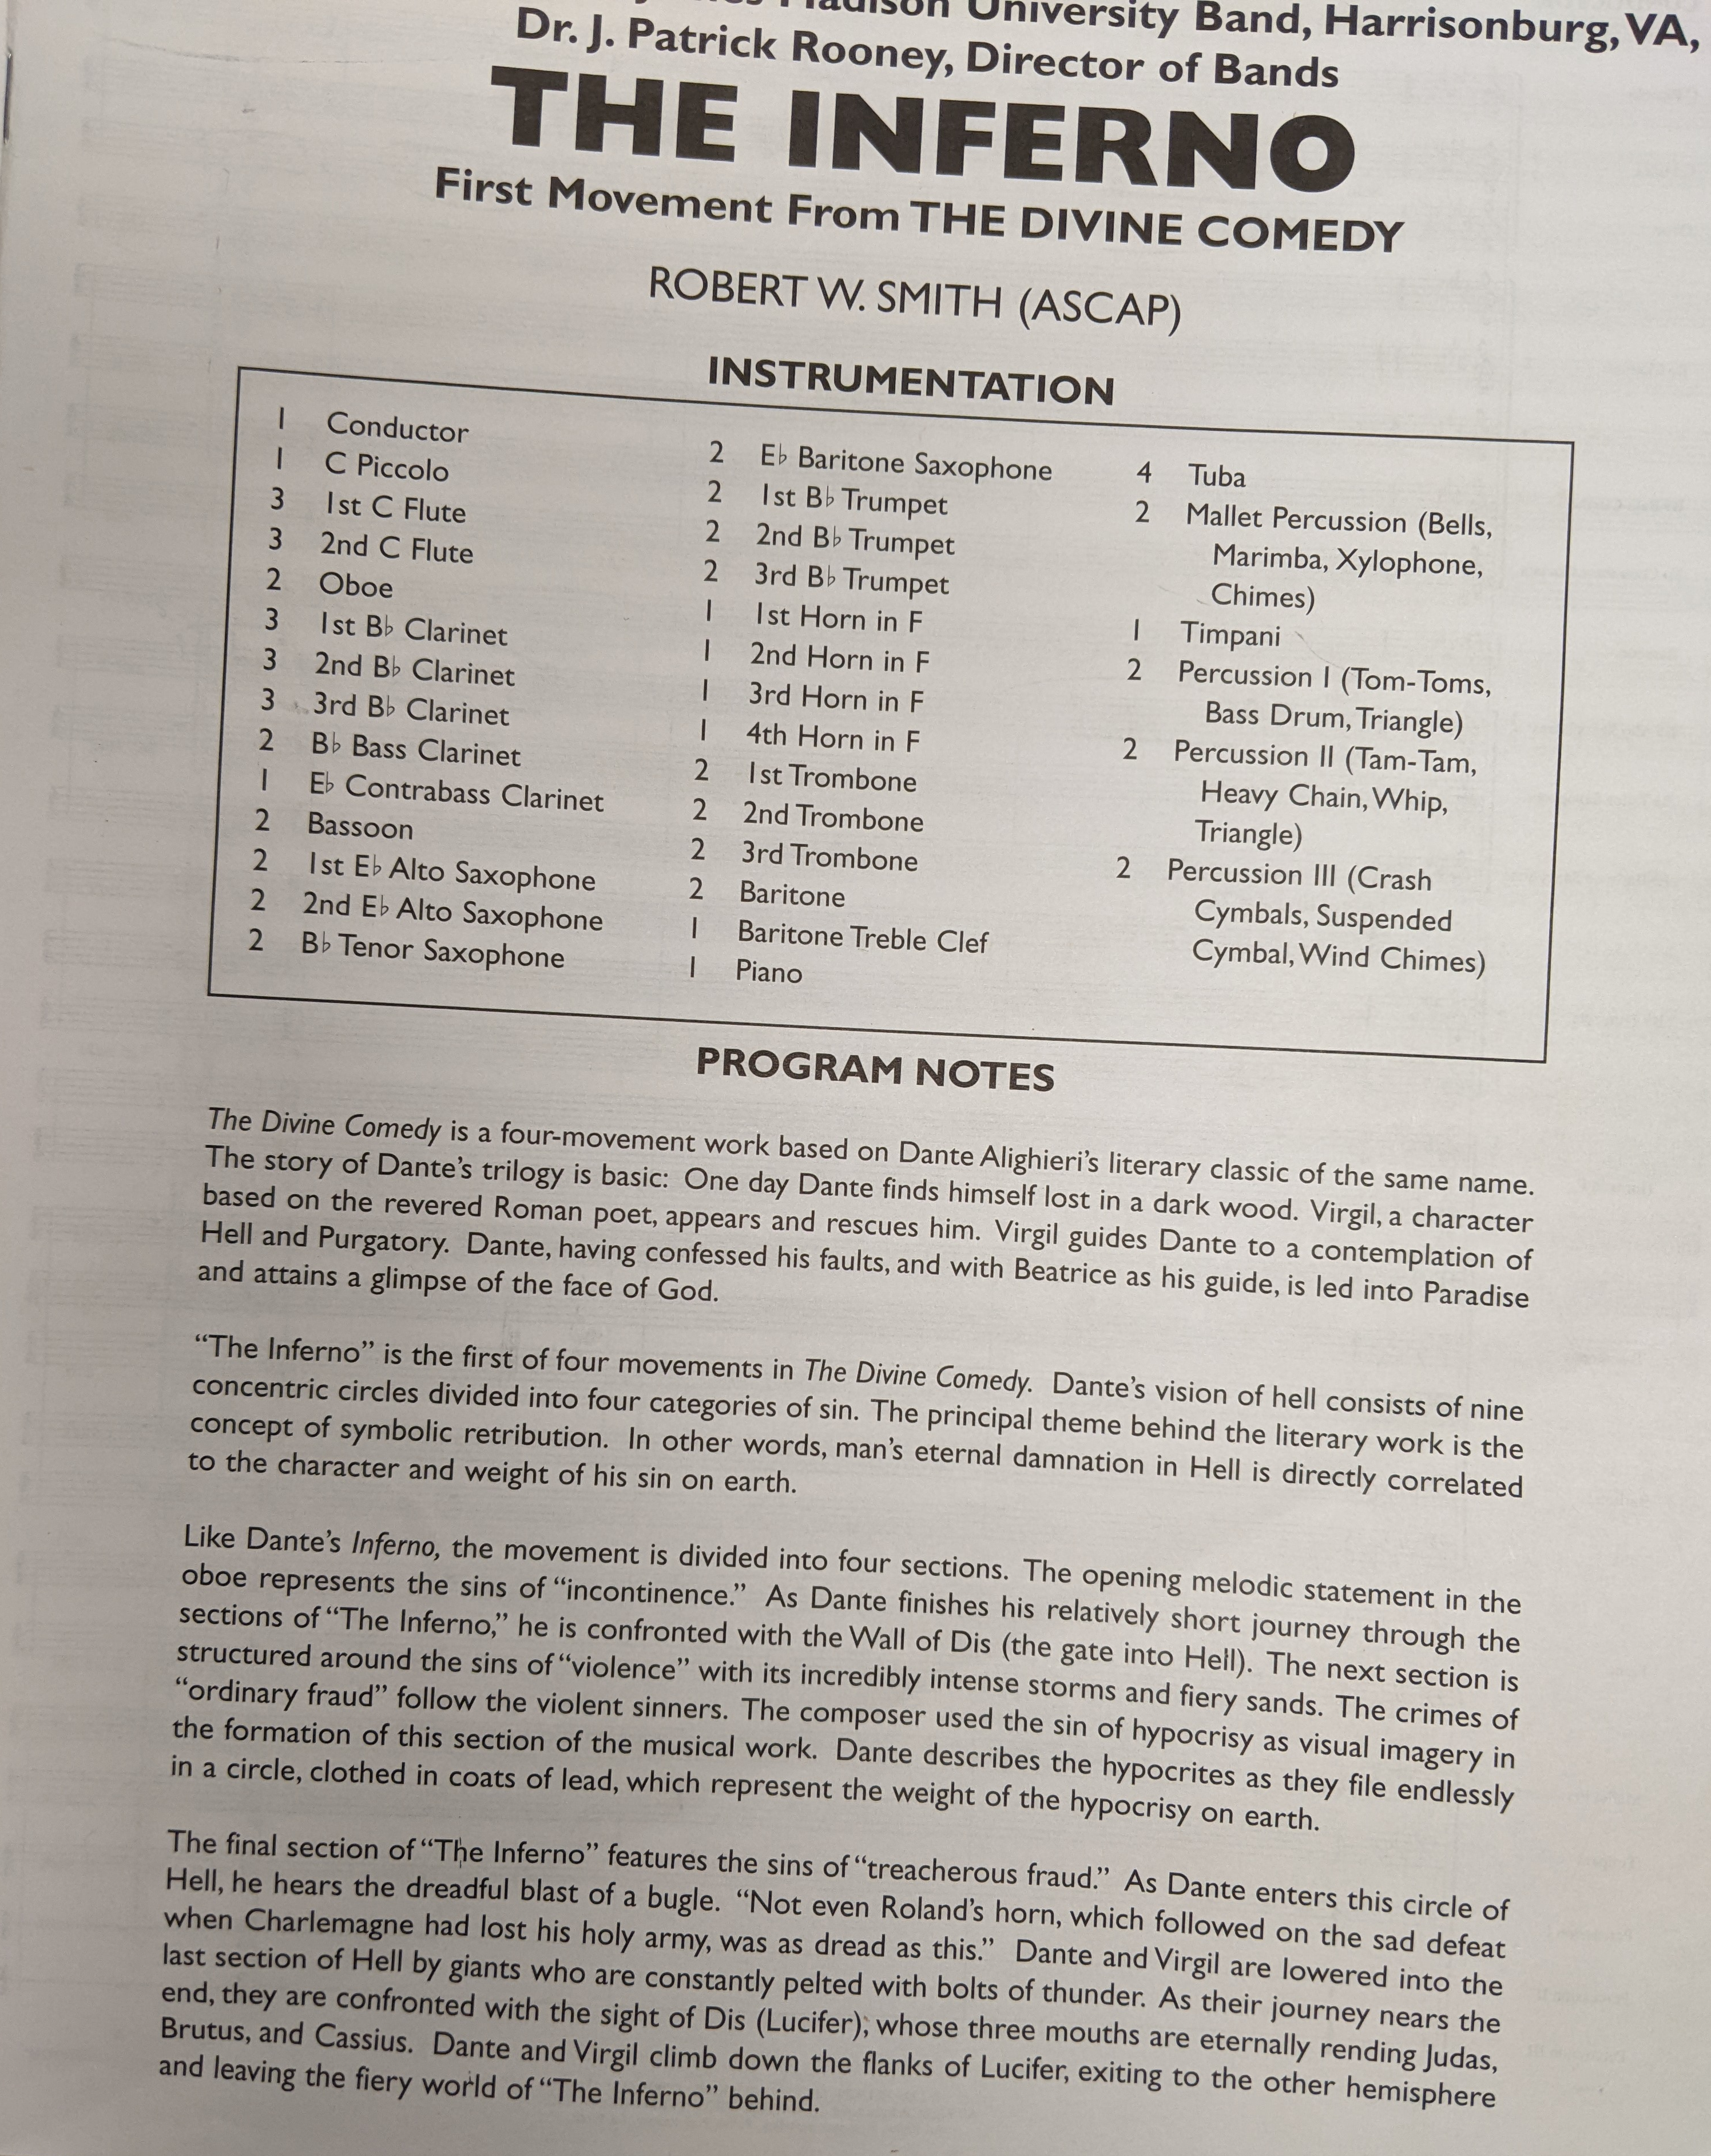 Figure 1: How instrumentation relates to compositions and individual parts
Setting up instrumentation
Adding instrumentation to a composition
Before managing individual parts, you can set up the instrumentation for a composition, to add parts all at once. You open the instrumentation page by selecting the composition on the Compositions page, and choosing the Instrumentation button at the top of the table.
Step 1: Set basic part information
The basic part information will be set for all the parts you select in the instrumentation page. Set the basic part information by peforming the following steps:
- Confirm composition details: Title, catalog number, paper size (use the paper size for parts, not the score)
- Set default page count: Choose the number of pages for most parts in the piece; you can adjust individual parts’ page counts later.
- Choose the paper size: Usually Folio (9x12”) for band music, but can be other sizes
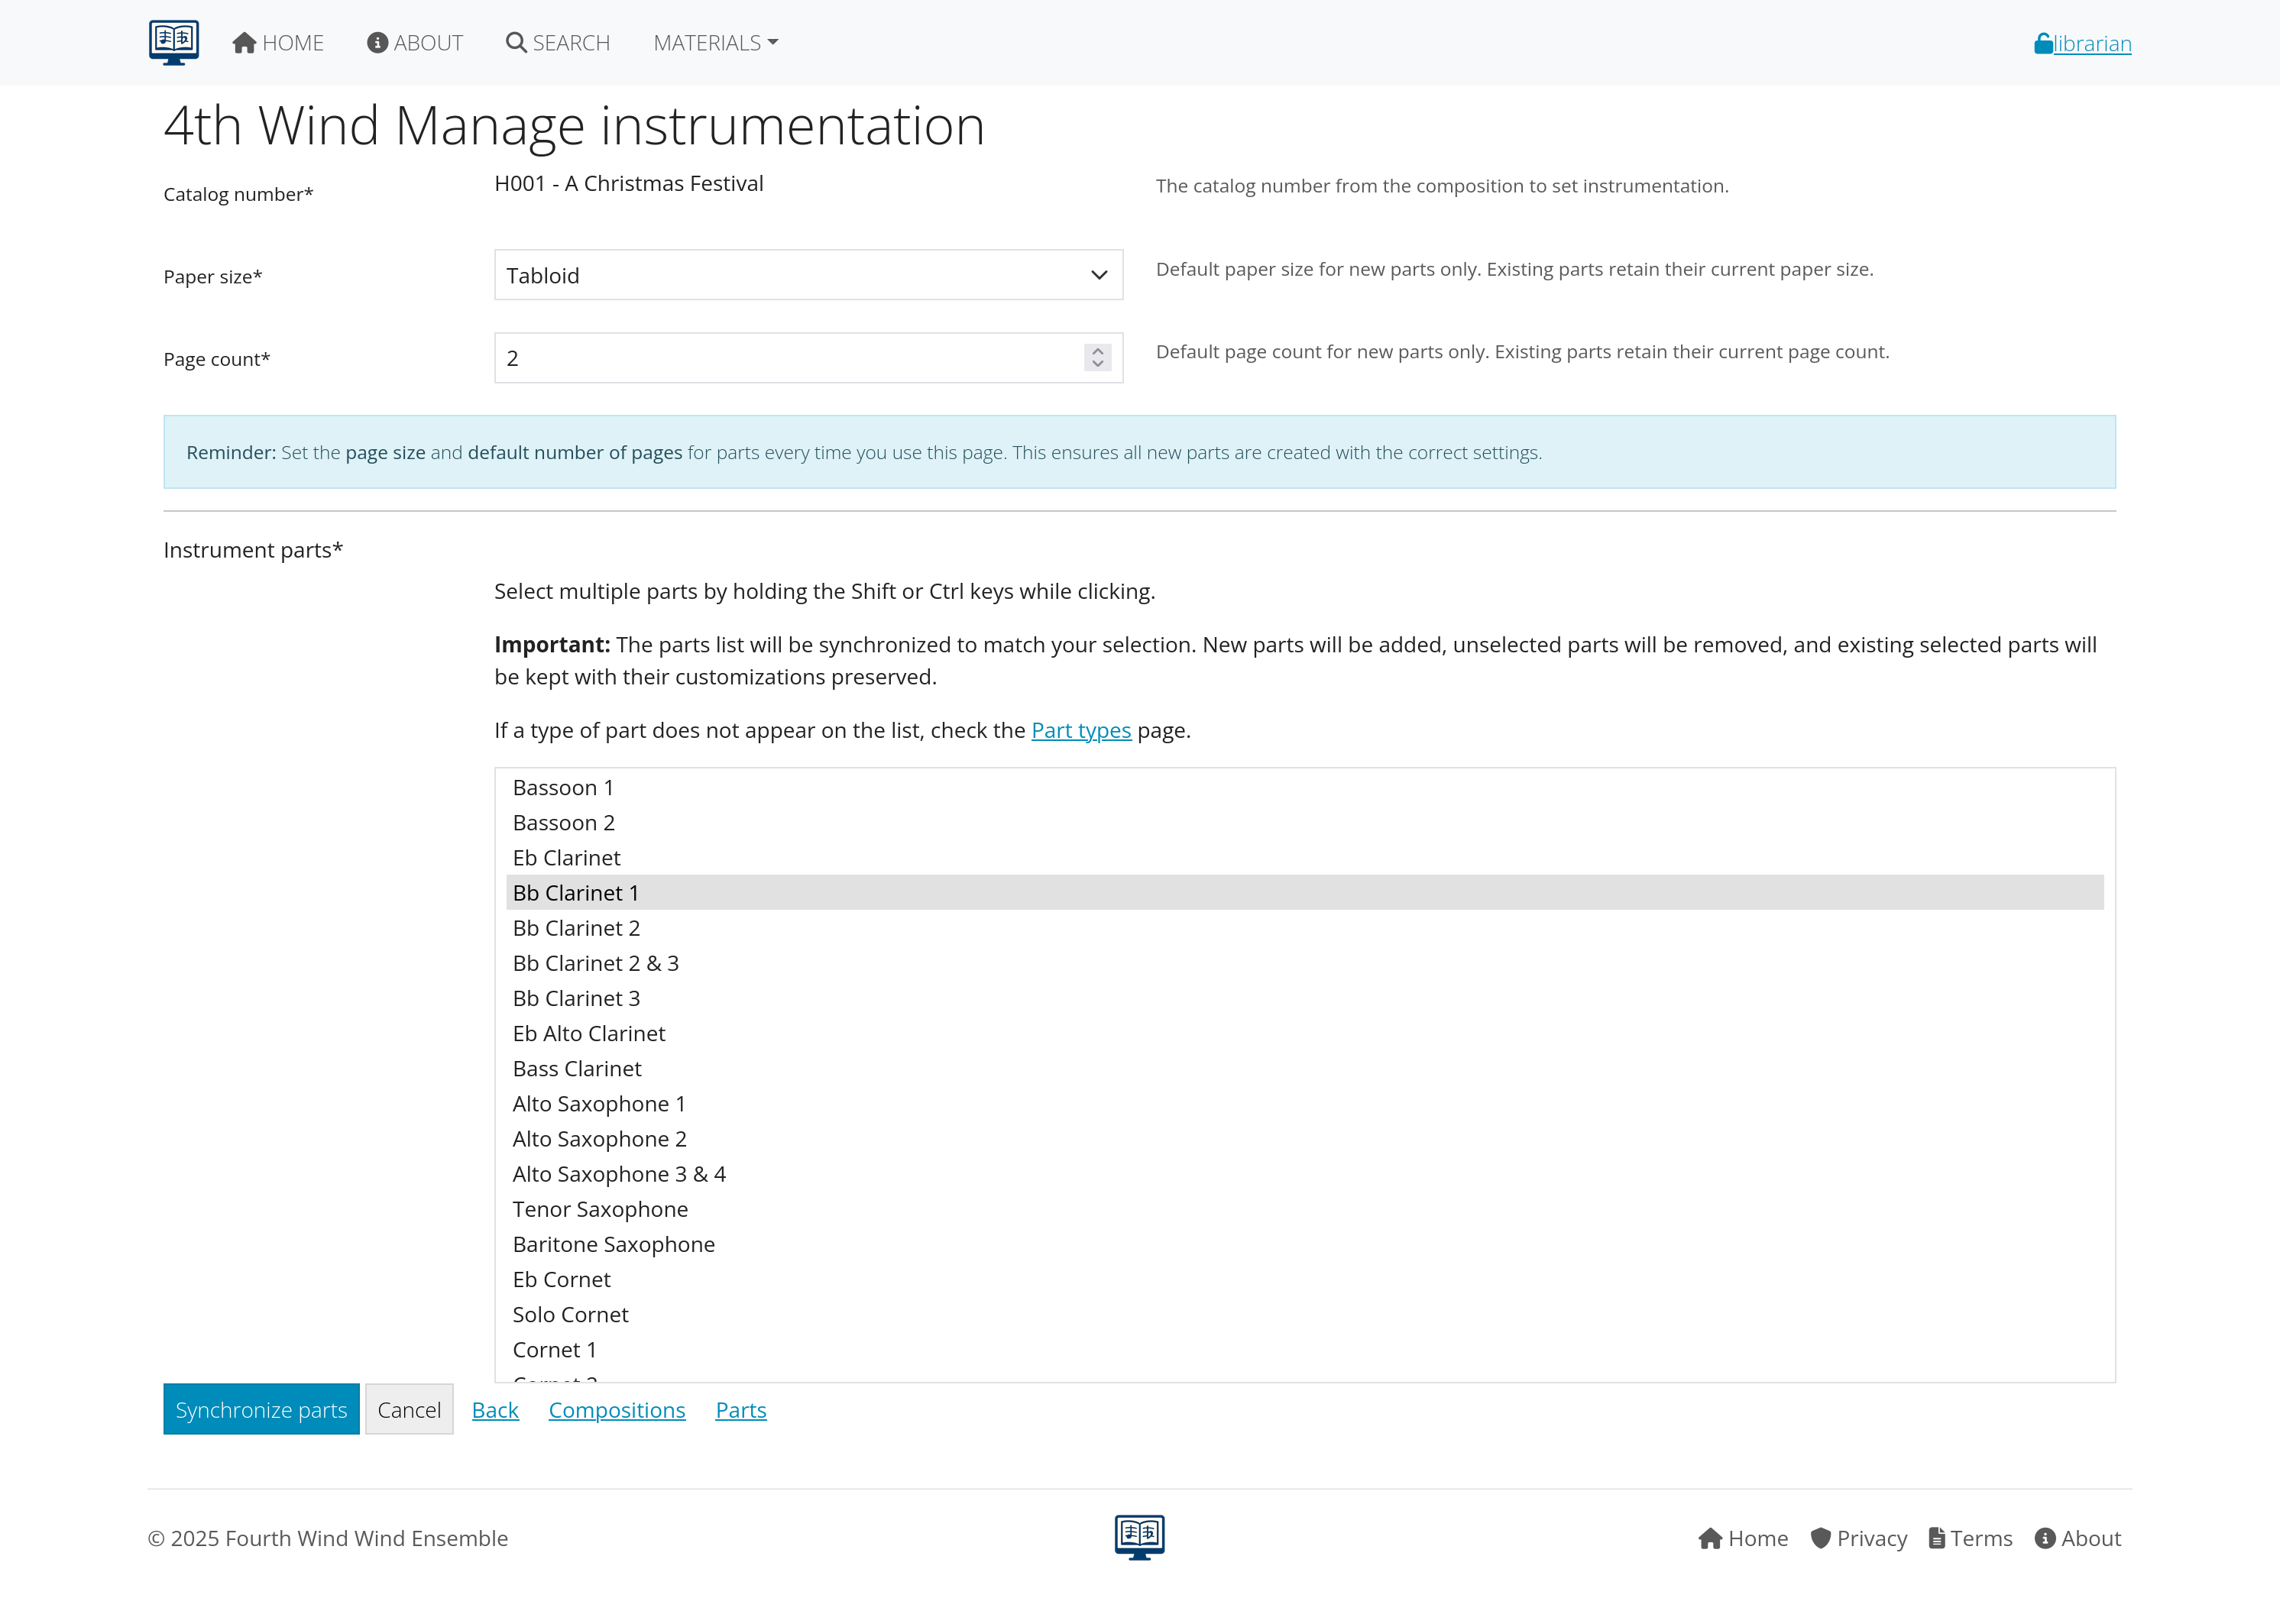 Figure 2: Initial instrumentation setup for a composition
Step 2: Select required instruments
- Review available instruments in the selection list
- Select all parts present in the composition. To select multiple parts, use the multi-select techniques:
- Hold Ctrl (Windows) or Cmd (Mac) while clicking
- Select multiple instruments at once
- Be thorough - missing parts cause problems later
Step 3: Add parts to composition
- Review selected instruments
- Click “Synchronize Parts”
The system creates individual part records, and a new dialog opens. From the list of synchonized parts, you can edit individual parts by choosing the Edit parts button.
Other links
You can instead choose one of the links at the bottom of the page:
- Cancel to clear the selections on the page and revert to the defaults. This is useful when you accidentally choose parts and want to start over.
- Back to return to the previous page
- Compositions to go to the Compositions page
- Parts to go to the Parts page
Next steps
With instrumentation properly set up:
- Learn individual parts management - Manage files, inventory, and details for each part
- Explore concert tracking - Track performances and recordings
- Review distribution - Share parts with users
Continue to the next section: Parts management to learn about managing individual instrument parts and files.